Zoiper runs on the Windows, Linux, Mac, Android, and iPhone platforms.
|
|
User Use default values unless otherwise stated.
|
Windows configuration
1 |
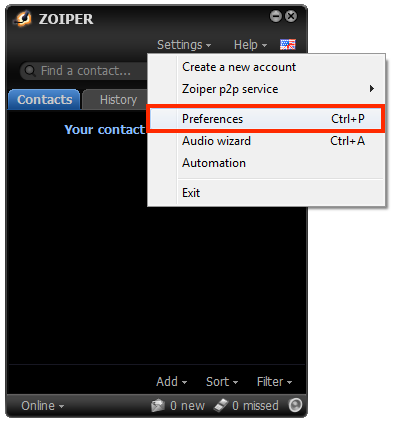
Select Preferences from the Settings menu.
|
||
|---|---|---|---|
2 |
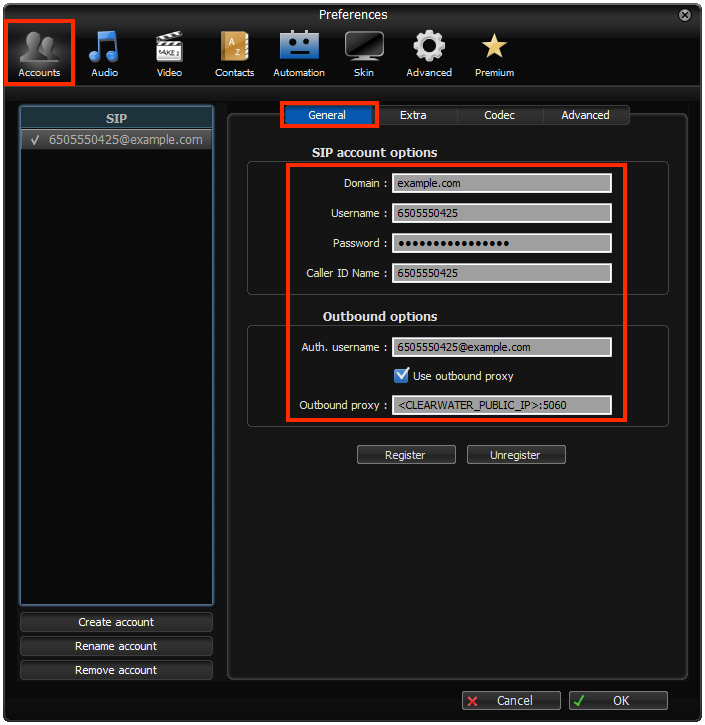
Under Accounts / General: SIP Account options
Outbound options
|
||
3 |
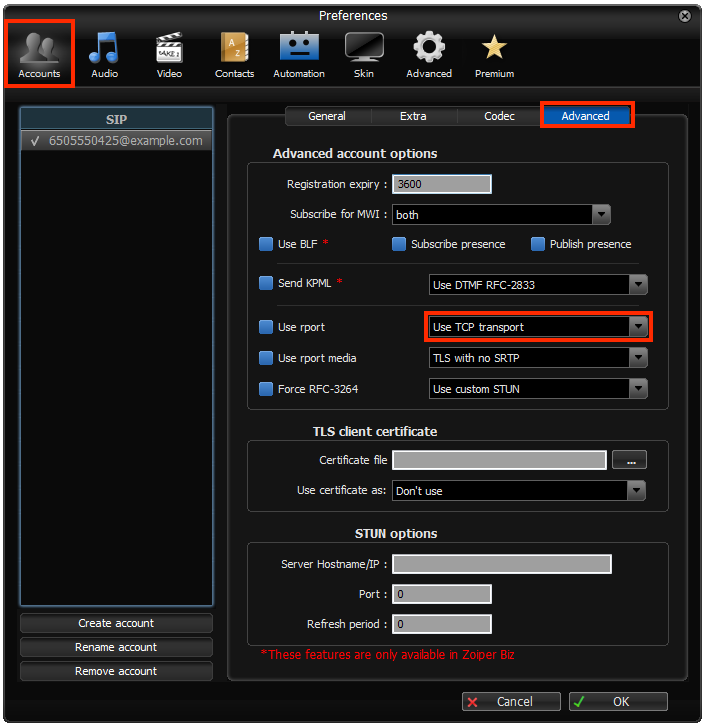
Under Accounts ▶ Advanced:
|
Android configuration
1 |
Go to Config ▶ Accounts ▶ Add Account ▶ SIP. |
||
|---|---|---|---|
2 |
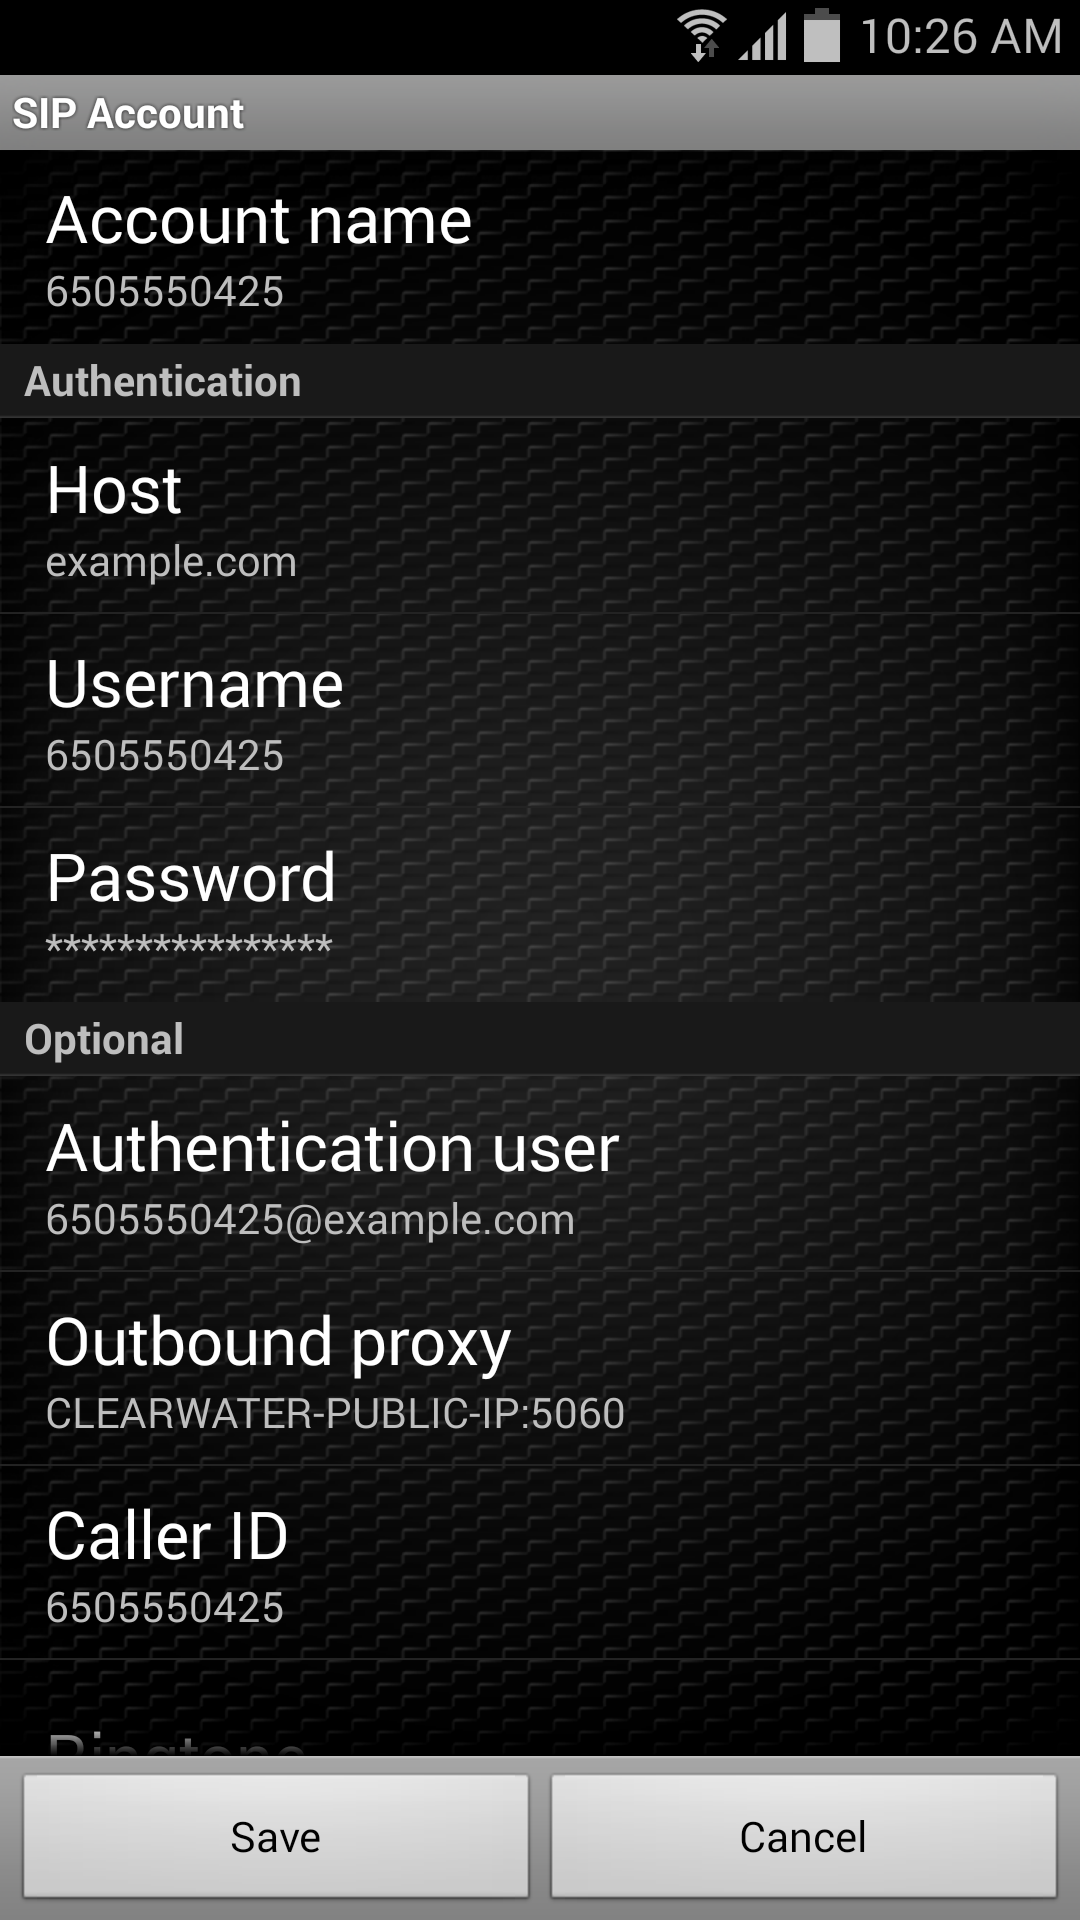
Enter the following details into the SIP Account screen: Authentication
Optional (not actually optional!)
|
||
3 |
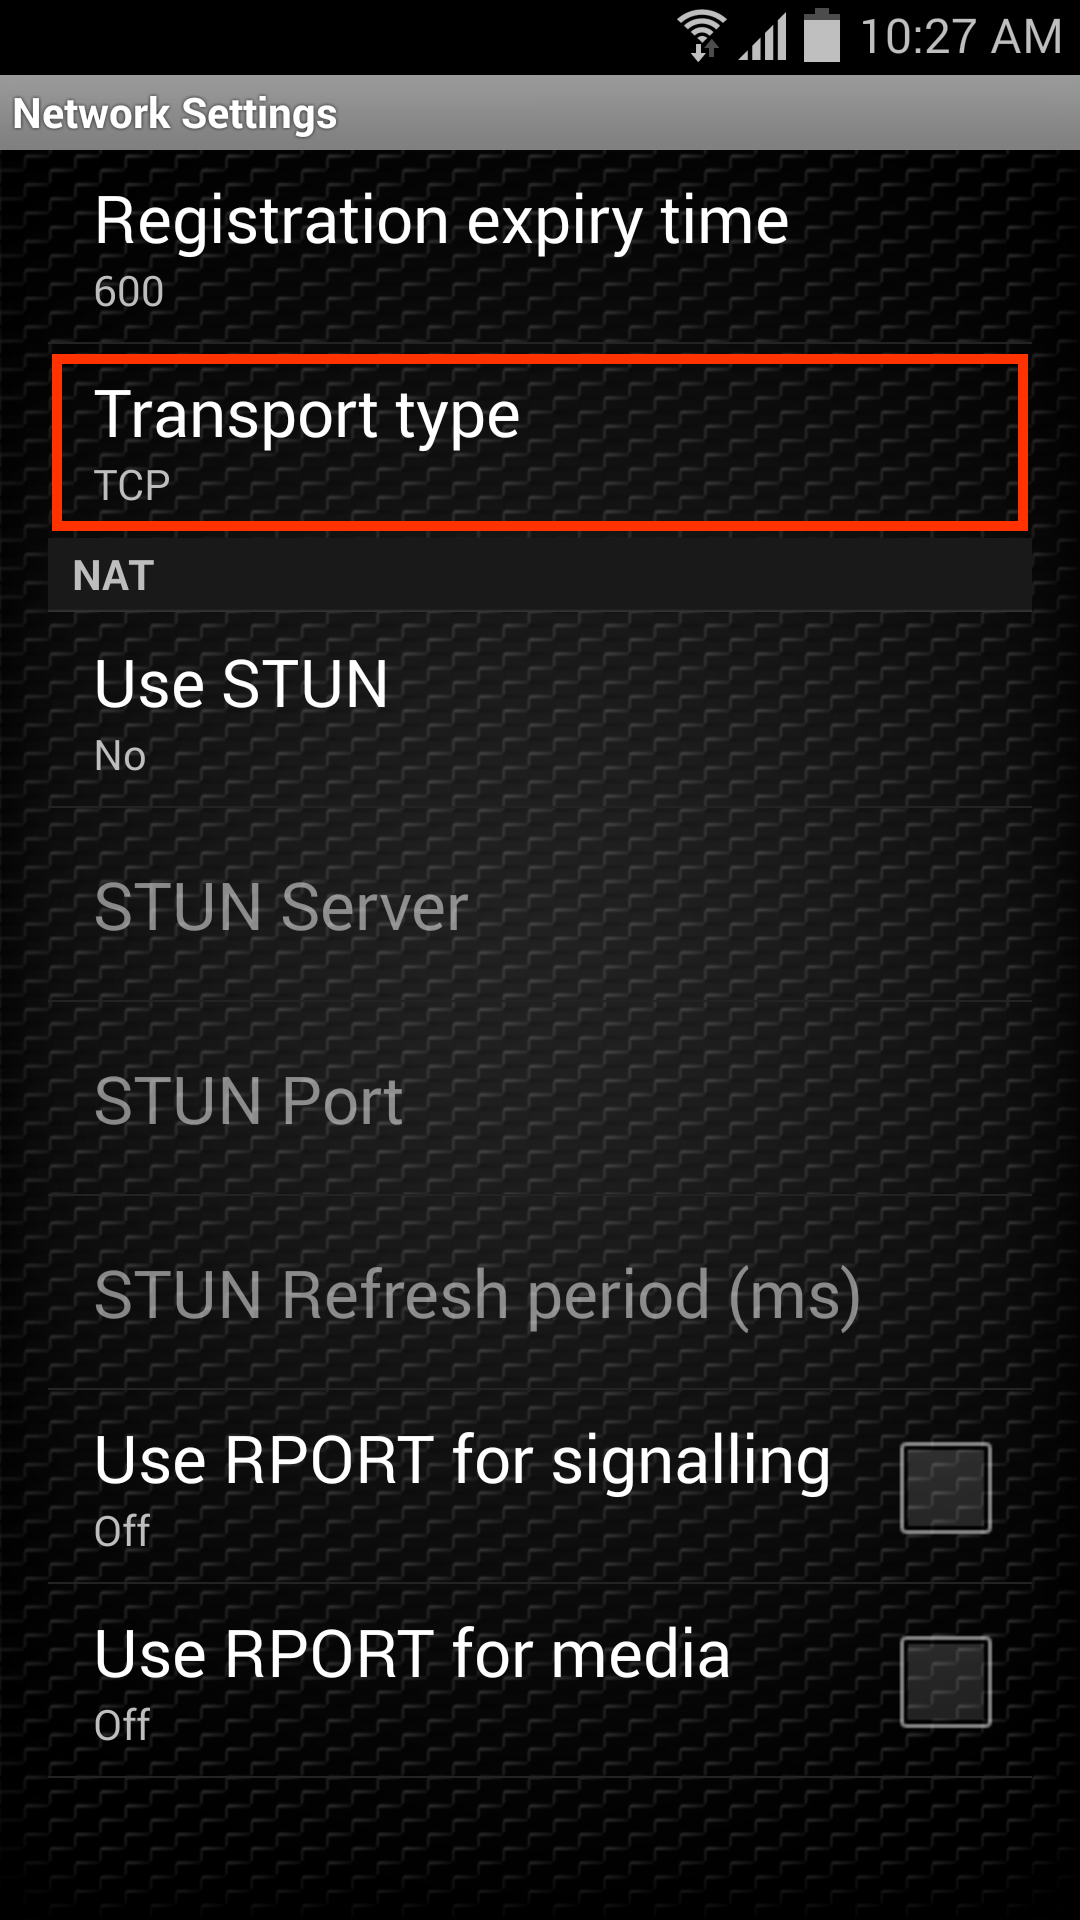
From the SIP Account screen, select Network Settings:
|
||
4 |
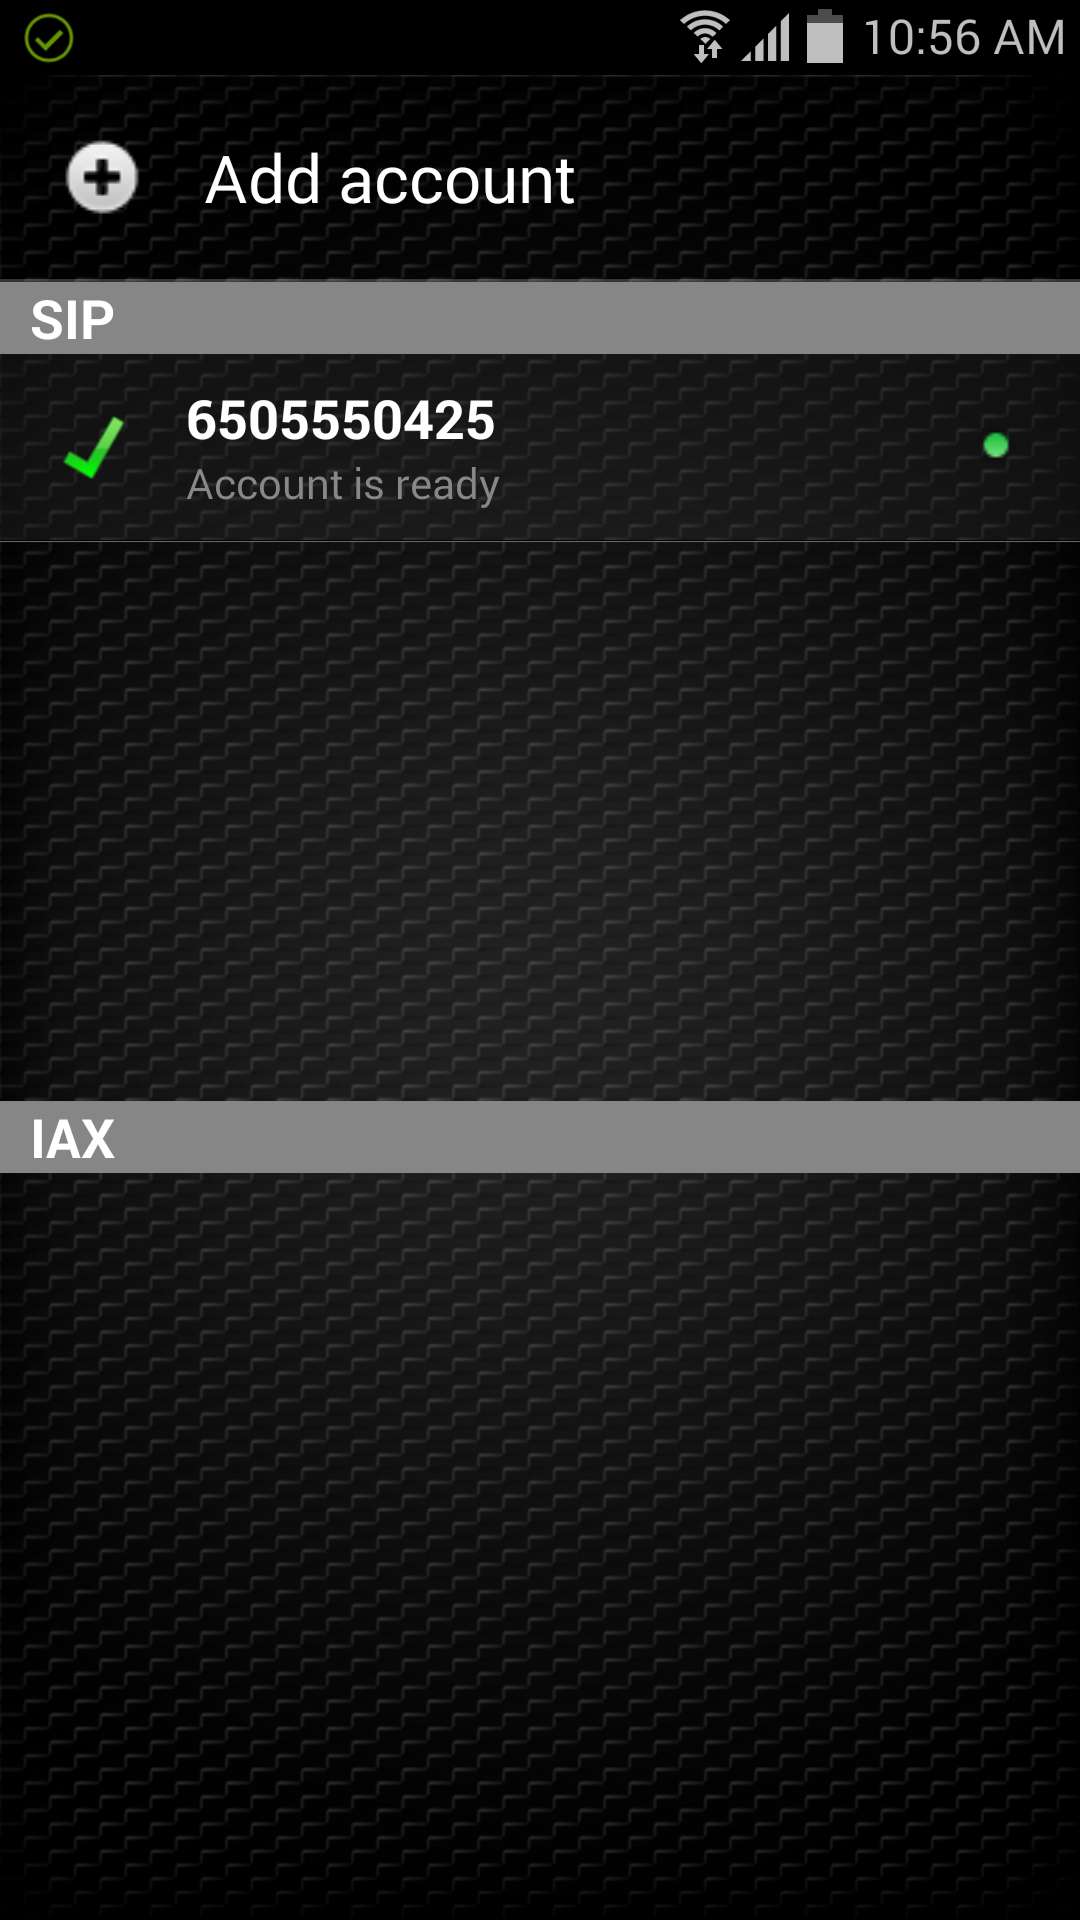
If set-up is successful, the new account will appear on the Config ▶ Accounts screen, with a green tick next to it.
|
iOS 7 configuration
1 |
Go to Settings ▶ Accounts ▶ Add Account |
|---|---|
2 |
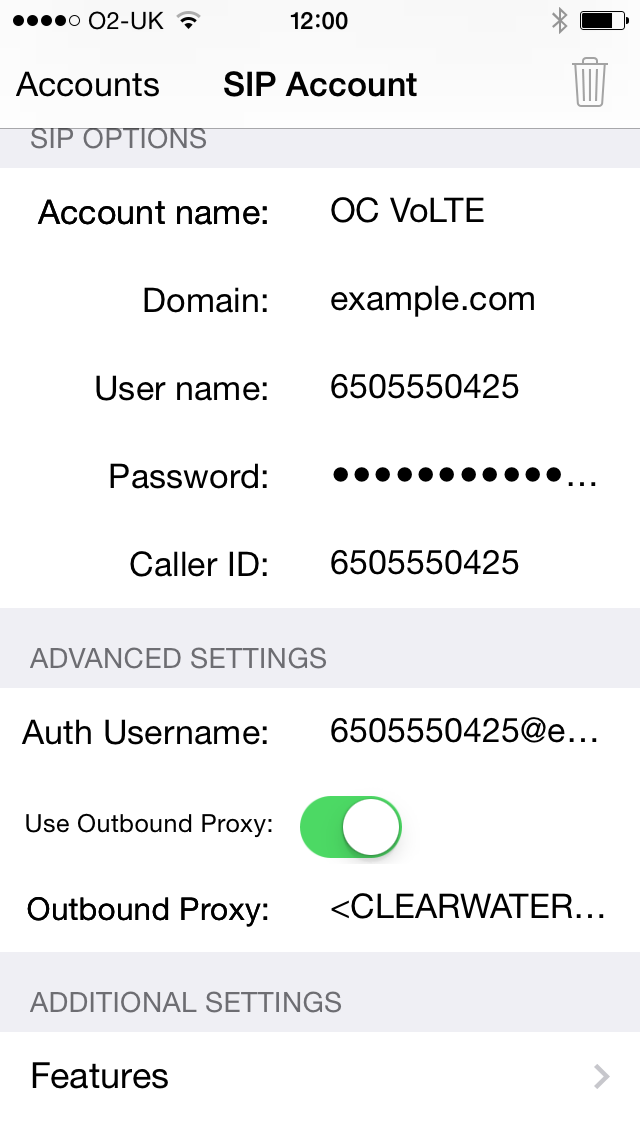
Enter the following details into the SIP Account screen: SIP options
Advanced Settings
|
3 |
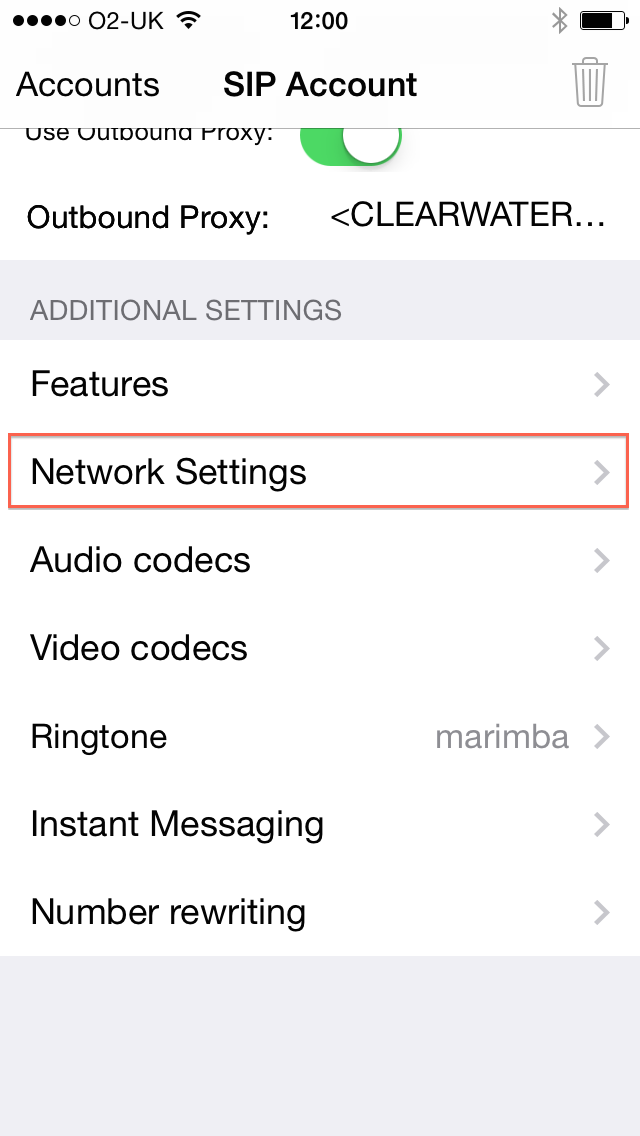
Under Additional Settings on the same screen:
|
4 |
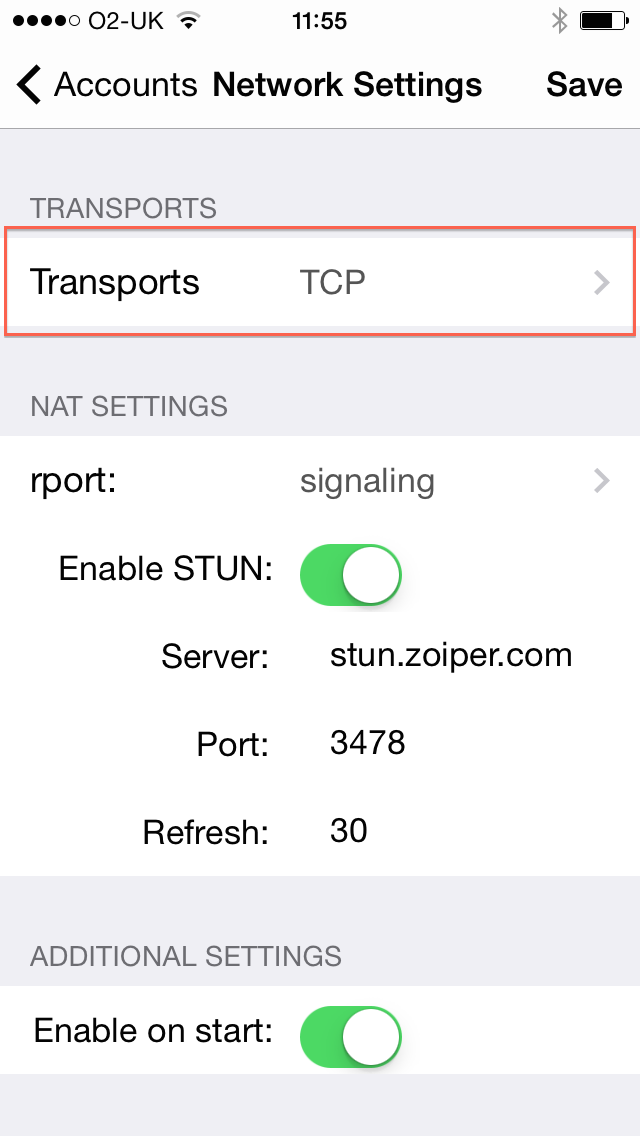
Select Transports type:
|
5 |
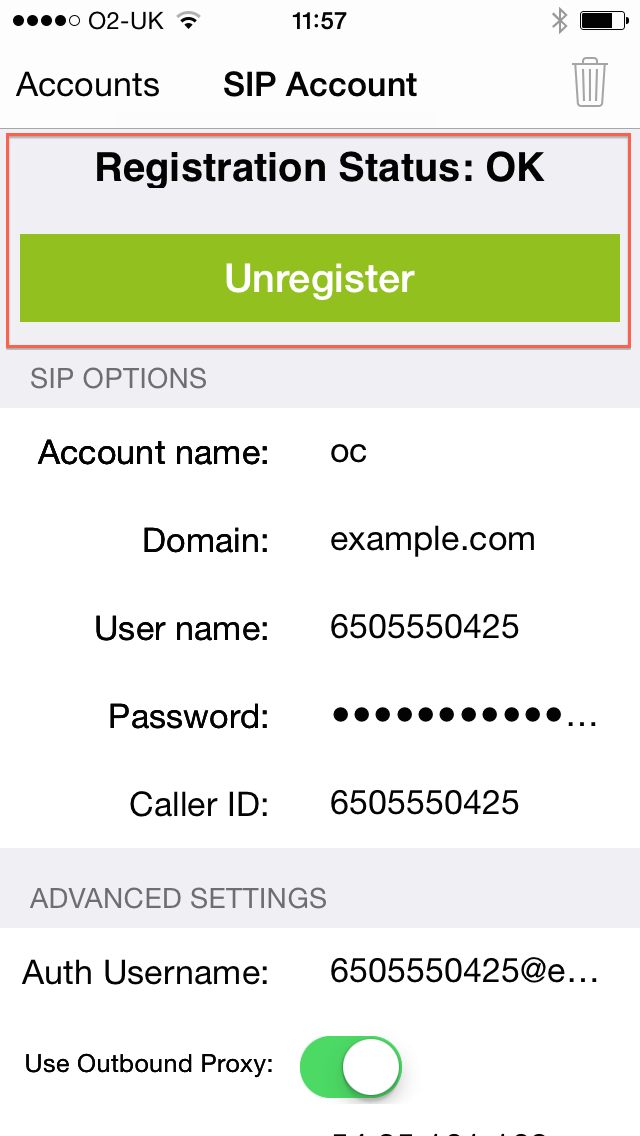
If set up is successful, the new account will appear on the Settings ▶ Accounts screen. If registration is successful, selecting the account will show a Registration Status of OK, under which there is an Unregister button to un-register.
|
