This document provides instructions for using the SIS REM Module to manage a SIS with the Rhino Element Manager.
Topics
This document includes the following topics:
-
About the SIS REM Module — what the SIS REM Module is and how to install it
-
Selecting a SIS instance — getting started with the SIS REM Module, and selecting a SIS instance to manage
-
Managing Components — using the SIS REM Module to manage macros, compositions, triggers, service references, external platforms, extension references, network interfaces, and network routes
-
Managing Subscriptions — using the SIS REM Module to manage address subscriptions and service key subscriptions
-
Managing Configuration — using the SIS REM Module to manage SIS configuration settings common to all components, and trigger address tracing.
Audience
This document is for system administrators, developers, and operators interested in using a web-based GUI to monitor, configure, or manage instances of a Service Interaction SLEE (SIS).
This document assumes a basic knowledge of core concepts about SIS, JAIN SLEE, and Java Management Extensions (JMX).
Scope
This document covers installing, running, configuring, and using the SIS REM Module with the Rhino Element Manager.
This document does not focus on…
-
the SIS generally — see the SIS Overview and Concepts
-
commands and operations, with links to javadocs, for administering the SIS — see the SIS Administration Guide
-
the Rhino Element Manager generally — see the Rhino Element Manager (REM) User Guide.
About the SIS REM Module
The SIS REM Module lets you use the Rhino Element Manager to manage a SIS.
Installing SIS REM Module
To install SIS REM Module, please see Installing REM Plugins in the REM user guide.
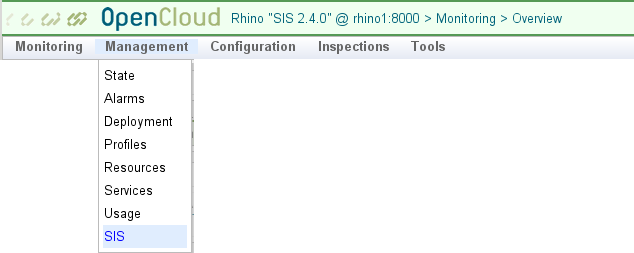
Once installed, SIS REM module adds a SIS option to the Management menu in the Rhino Management area of REM.
Running SIS REM Module
To run the SIS REM module:
-
Select SIS from the Management menu.
-
Select a SIS instance in REM
-
Select procedures to manage components, subscriptions, or configuration.
Selecting a SIS Instance
To select a SIS in REM (with the SIS REM module), from the REM dashboard:
1 |
From the menu bar at the top of the REM dashboard, select Management ▶ SIS. A list of running SIS Instances displays. 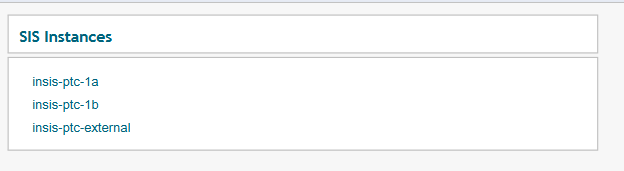
|
||
|---|---|---|---|
2 |
Click to select a SIS instance. Links display to manage the selected instance. 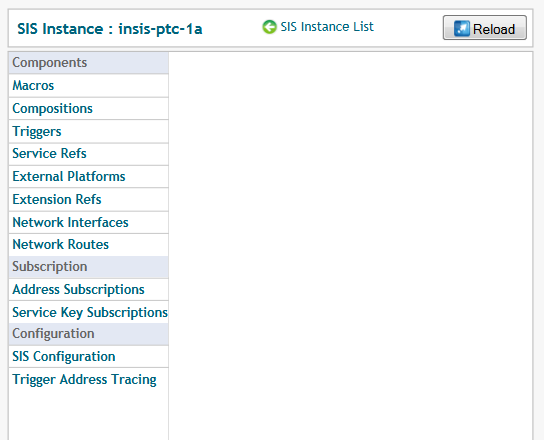
|
||
3 |
To select different instance to manage:
|
||
4 |
To reload the selected instance:
|
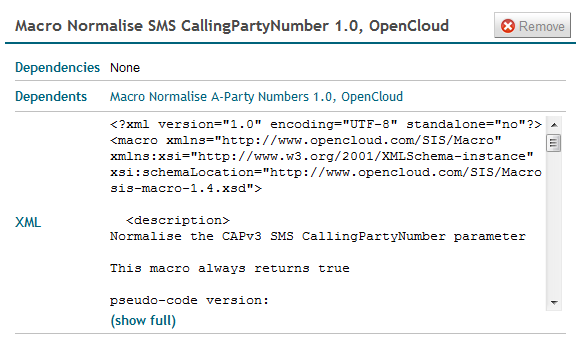
Macros (SIS REM)
You can use the SIS REM module to view, remove, install, or replace macros.
| |
What are SIS macros?
A macro is an expression that can be reused multiple times in other SIS macros, triggers, and compositions. For details, see Managing Macros in the SIS Administration Guide. |
To manage macros:
1 |
From the SIS instance page, select Macros. A list of Macros installed for the selected instance displays. 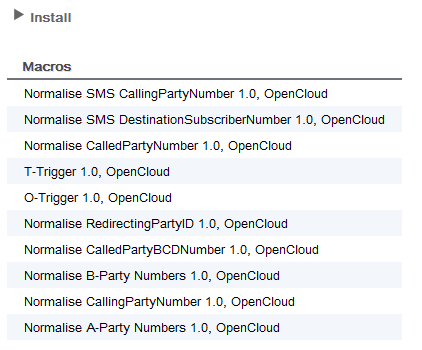
|
||||||||||||
|---|---|---|---|---|---|---|---|---|---|---|---|---|---|
2 |
|
| |
Changes to SIS macros do not take effect immediately. The SIS must explicitly reload its components to apply any changes. |
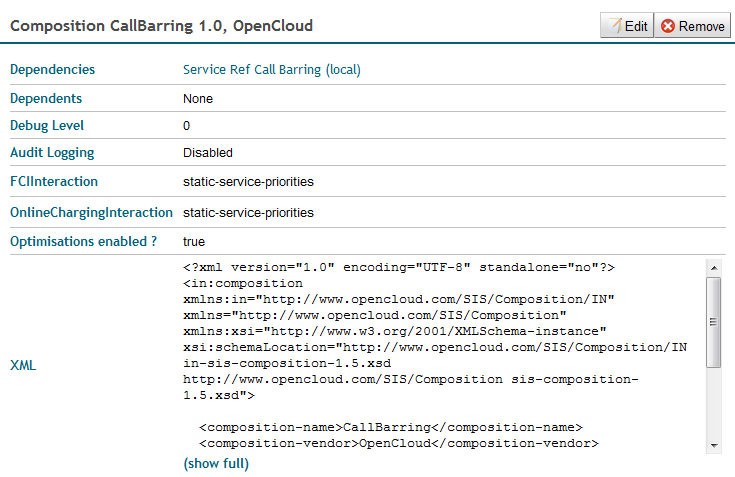
Compositions (SIS REM)
You can use the SIS REM module to view, configure, remove, install, or replace compositions.
| |
What are SIS compositions?
A composition describes the services to be invoked for a particular call and the order the services should be invoked. For details, see Managing Compositions in the SIS Administration Guide. |
To manage compositions:
1 |
From the SIS instance page, select Compositions. A list of Compositions installed in the selected instance displays. 
|
||||||||||||||
|---|---|---|---|---|---|---|---|---|---|---|---|---|---|---|---|
2 |
|
| |
Changes to SIS compositions do not take effect immediately. The SIS must explicitly reload its components to apply any changes. |
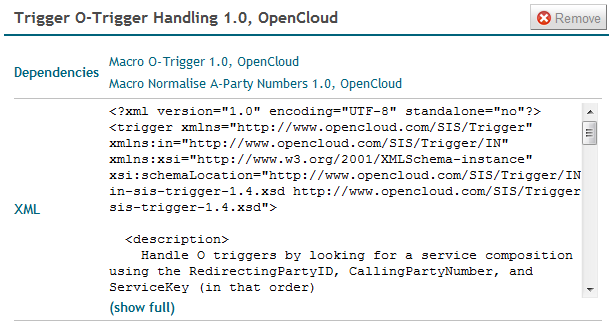
Triggers (SIS REM)
You can use the SIS REM module to view, remove, activate, deactivate, install, or replace triggers.
| |
What are SIS triggers?
A trigger is used to select a composition for execution for each call received by the SIS. For details, see Managing Triggers in the SIS Administration Guide. |
To manage triggers:
1 |
From the SIS instance page, select Triggers. A list of Triggers installed for the selected instance displays. 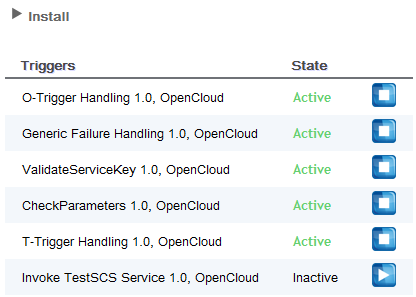
|
||||||||||||||
|---|---|---|---|---|---|---|---|---|---|---|---|---|---|---|---|
2 |
|


| |
Changes to SIS triggers do not take effect immediately. The SIS must explicitly reload its components to apply any changes. |
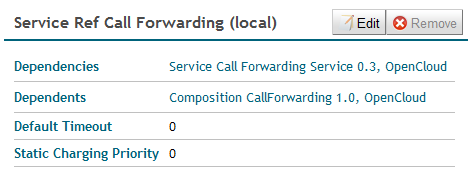
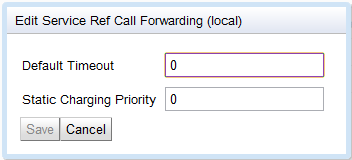
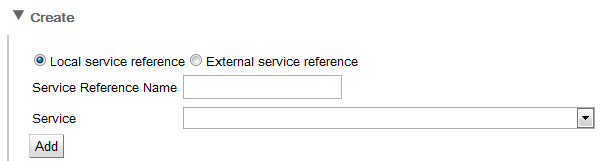
Service References (SIS REM)
You can use the SIS REM module to view, remove, configure, or create service references.
| |
What are SIS service references?
A service reference identifies a service that can be invoked from a composition. Services may be either:
For details, see Managing Service References in the SIS Administration Guide. |
To manage service references:
1 |
From the SIS instance page, select Service Refs. A list of Service Refs installed for the selected instance displays. 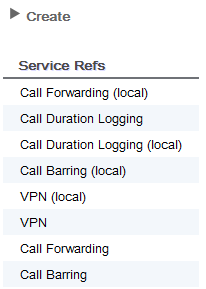
|
||||||||||||
|---|---|---|---|---|---|---|---|---|---|---|---|---|---|
2 |
|
| |
Changes to SIS service references do not take effect immediately. The SIS must explicitly reload its components to apply any changes. |
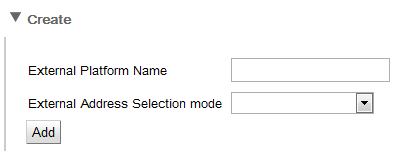
External Platforms (SIS REM)
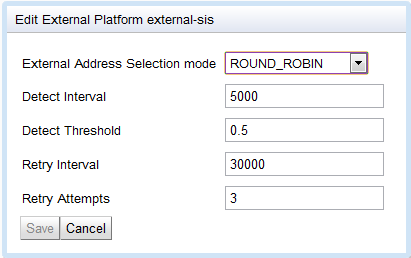
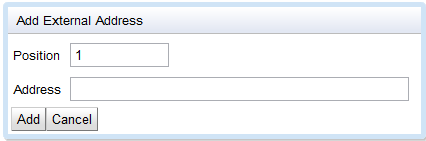
You can use the SIS REM module to view, remove, configure, activate, deactivate, repair, or create external platforms.
| |
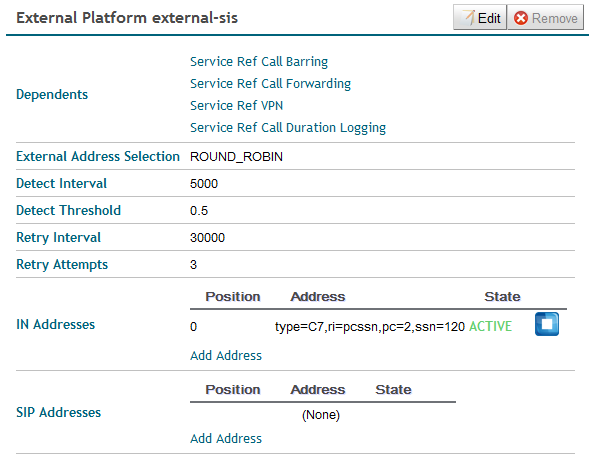
What are SIS external platforms?
An external platform definition describes the properties of an external service usable in a SIS composition. It includes:
For details, see Managing External Platforms in the SIS Administration Guide. |
To manage external platforms:
1 |
From the SIS instance page, select External Platforms. A list of External Platforms installed for the selected instance displays. 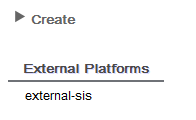
|
||||||||||||||||||||||
|---|---|---|---|---|---|---|---|---|---|---|---|---|---|---|---|---|---|---|---|---|---|---|---|
2 |
|
| |
Changes to SIS external platforms do not take effect immediately. The SIS must explicitly reload its components to apply any changes. |
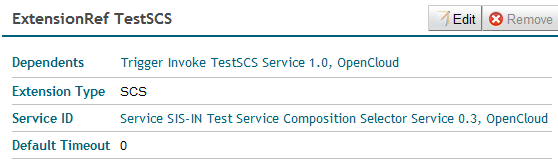
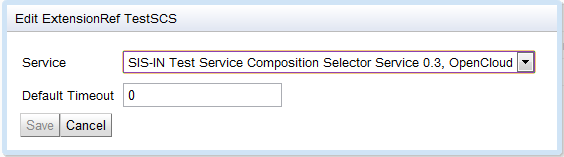
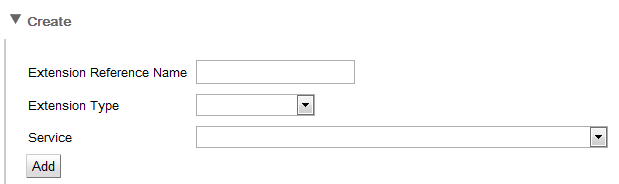
Extension References (SIS REM)
You can use the SIS REM module to view, remove, configure, or create extension references.
| |
What are SIS extension references?
An extension reference identifies an extension component. There are two types of extension component supported by the SIS:
SIS extension components are implemented as JAIN SLEE services, and an extension reference identifies an extension component using its SLEE service component identifier. For details, see Managing Extension References in the SIS Administration Guide. |
To manage extension references:
1 |
From the SIS instance page, select Extension Refs. A list of Extension Refs installed in the selected instance displays. 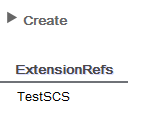
|
||||||||||||
|---|---|---|---|---|---|---|---|---|---|---|---|---|---|
2 |
|
| |
Changes to SIS extension references do not take effect immediately. The SIS must explicitly reload its components to apply any changes. |
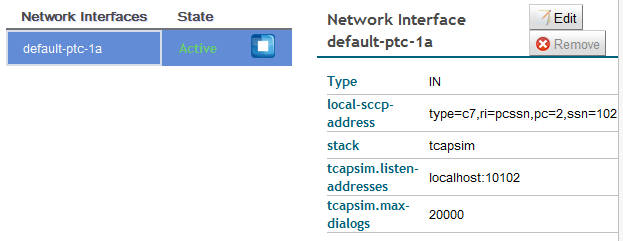
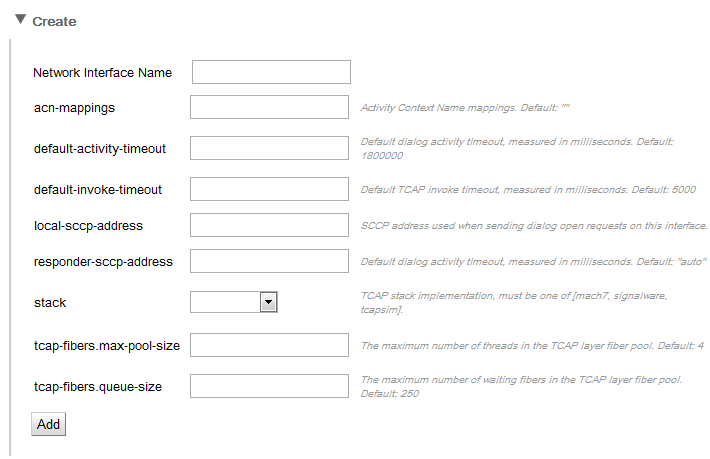
Network Interfaces (SIS REM)
You can use the SIS REM module to view, enable and disable, create, edit, and remove network interfaces.
| |
What are network interfaces?
A network interface definition describes the properties of a network connection point. It includes:
For details, see Managing Network Interfaces in the SIS Administration Guide. |
To manage network interfaces:
1 |
From the SIS instance page, select Network Interfaces. A list of Network Interfaces in the selected instance displays. 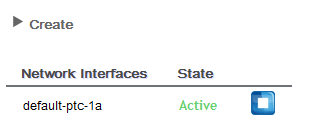
|
||||||||||||
|---|---|---|---|---|---|---|---|---|---|---|---|---|---|
2 |
|

| |
|
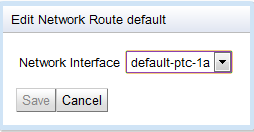
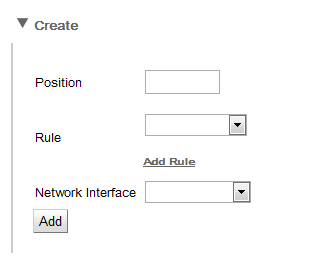
Network Routes (SIS REM)
You can use the SIS REM module to create, edit, and remove network routes.
| |
What are network routes?
A network route identifies when a particular network interface will be used when an outbound network dialog is created. It includes:
The SIS evaluates network route rules in position order, starting from position 0, until a rule matches. For details, see Managing Network Routes in the SIS Administration Guide. |
To manage network routes:
1 |
From the SIS instance page, select Network Routes. A list of Network Routes in the selected instance displays. 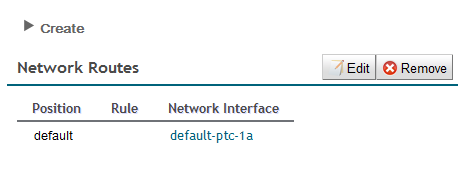
|
||||||||||||||
|---|---|---|---|---|---|---|---|---|---|---|---|---|---|---|---|
2 |
|

| |
|
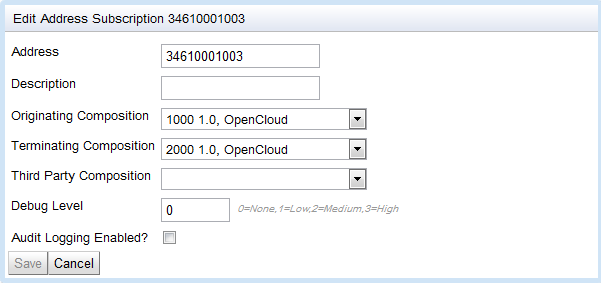
Address Subscriptions (SIS REM)
You can use the SIS REM module to find, edit, remove, and install address subscriptions.
| |
What are address subscriptions?
Address subscriptions can be used by triggers during composition selection to select a composition based on an address contained in the initial event. For details, see Managing Address Subscriptions in the SIS Administration Guide. |
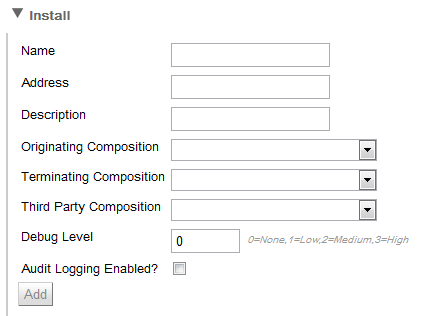
To manage address subscriptions:
1 |
|||||||||||||||||||||
|---|---|---|---|---|---|---|---|---|---|---|---|---|---|---|---|---|---|---|---|---|---|
2 |
|


Service Key Subscriptions (SIS REM)
You can use the SIS REM module to find, edit, remove, and install service key subscriptions.
| |
What are service key subscriptions?
Service key subscriptions can be used by triggers during composition selection to select a composition based on the service key contained in the initial event. For details, see Managing Service Key Subscriptions in the SIS Administration Guide. |
| |
This is a SIS feature for IN. |
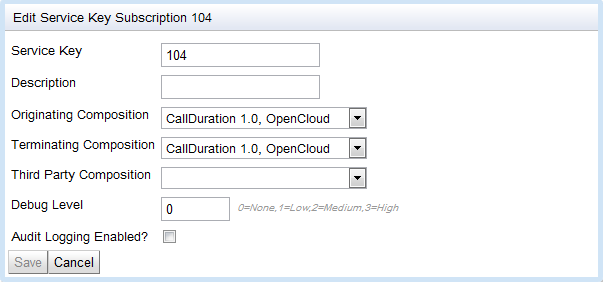
To manage service key subscriptions:
1 |
From the SIS instance page, select Service Key Subscriptions. The Service Key Subscriptions page displays. 
|
||||||||||||||||||||
|---|---|---|---|---|---|---|---|---|---|---|---|---|---|---|---|---|---|---|---|---|---|
2 |
|


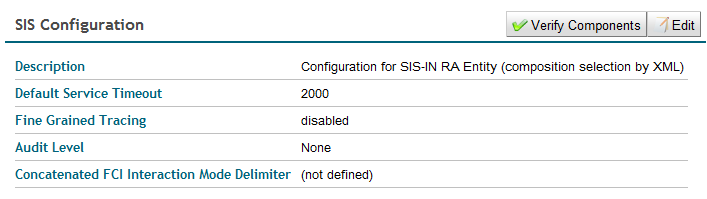
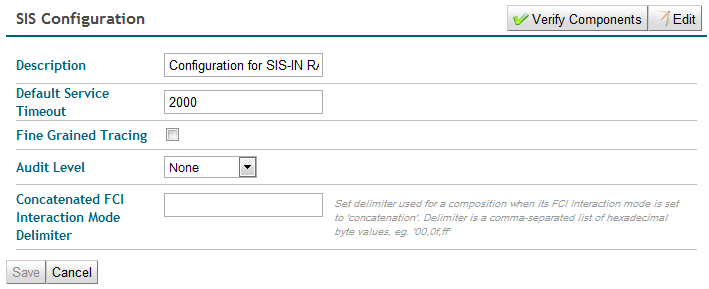
SIS Configuration (SIS REM)
You can use the SIS REM module to verify and edit configuration settings.
| |
What can you configure for all components?
All components in a SIS instance share these configuration settings:
For details, see Managing SIS Configuration in the SIS Administration Guide. |
To manage SIS configuration:
1 |
|||||||||
|---|---|---|---|---|---|---|---|---|---|
2 |
|
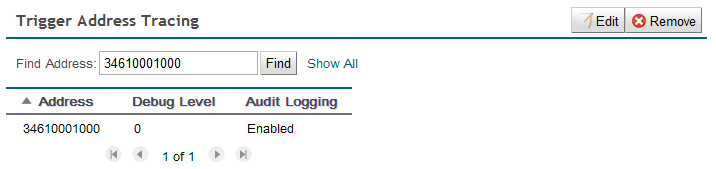
Trigger Address Tracing (SIS REM)
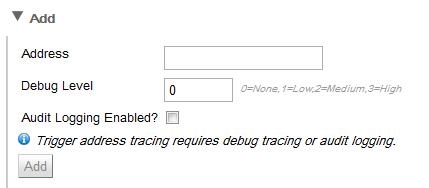
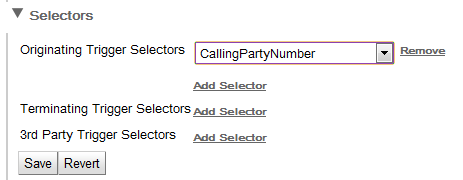
You can use the SIS REM module to find, edit, remove, and add trigger address tracing profiles; and to set trigger selectors.
| |
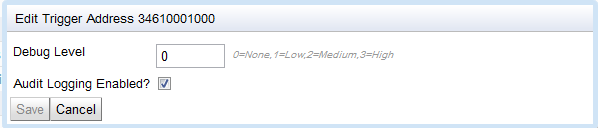
Managing debug logging levels for trigger addresses
You can enable debug tracing for selected calls using trigger address tracing. For example, to enable debug logging for a particular MSISDN:
|
| |
The effect of trigger address tracing is the same as assigning a fine-grained tracing level to an address subscription, but trigger address tracing is more flexible in that many more different signaling parameters are available to trigger debug logging, and a subscription does not have to be selected in order to enable the debug logging. For details see Managing Trigger Address Tracing in the SIS Administration Guide. |
To manage trigger address tracing:
1 |
From the SIS instance page, select Trigger Address Tracing. The Trigger Address Tracing page displays. 
|
||||||||||||||||||
|---|---|---|---|---|---|---|---|---|---|---|---|---|---|---|---|---|---|---|---|
2 |
|