About this document
This document explains how to install and start the Rhino Element Manager (REM). Documentation about use of the element manager is in the "online help" screens on every within REM itself.
About the Rhino Element Manager
The Rhino Element Manager (REM) is a web-based console for monitoring, configuring, and managing a Rhino SLEE. REM provides a graphical user interface (GUI) for many of the management features documented in the Rhino Administration and Deployment Guide.
You can use REM to:
-
monitor a Rhino element (cluster nodes, activities, events, SBBs, alarms, resource adaptor entities, services, trace notifications, statistics, logs)
-
manage a Rhino element (SLEE state, alarms, deployment, profiles, resources), instances available in REM, and REM users
-
configure threshold rules, rate limiters, licenses, logging, and object pools
-
inspect activities, SBBs, timers, transactions, and threads
-
scan key information about multiple Rhino elements on a single screen.
| |
This release of REM can be used with Rhino versions 2.5, 2.4 and 2.3. |
Topics
This document includes the following topics:
| Topic | Explains … |
|---|---|
how to get started with REM |
|
the functional areas in REM |
|
how to use tools built in to REM |
|
how to install REM plugins and extensions |
|
how to manually upgrade your REM installation to a new version |
|
known issues, system properties, SSO authentication, and running REM over HTTPS. |
Audience and Scope
Intended Audience
This document is for system administrators, developers, and operators interested in using a web-based GUI to monitor, configure, or manage instances of a Rhino SLEE.
This document assumes a basic knowledge of core concepts about Rhino, JAIN SLEE and Java Management Extensions (JMX).
Scope
This document covers installing, running, configuring, and using the Rhino Element Manager.
This document does not focus on…
-
installing and starting the SLEE — see the Rhino (Production) Getting Started Guide
-
commands and operations, with links to javadocs, for administering and deploying a Rhino SLEE — see the Rhino Administration and Deployment Guide
-
tools for Rhino maintenance — see Rhino Management Tools
-
troubleshooting — see the Rhino Troubleshooting Guide
Installing, Starting and Logging in to REM
Check JAVA_HOME, run rem.sh, and open the login page
To run the Rhino Element Manager:
1 |
Ensure the |
||
2 |
Run the |
||
3 |
Open http://localhost:8080/rem/. The Rhino Element Manager login page displays.
|
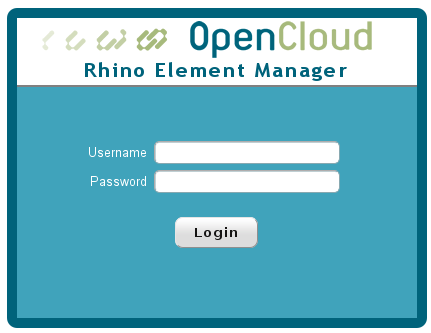
Enter username and password
To login to REM:
1 |
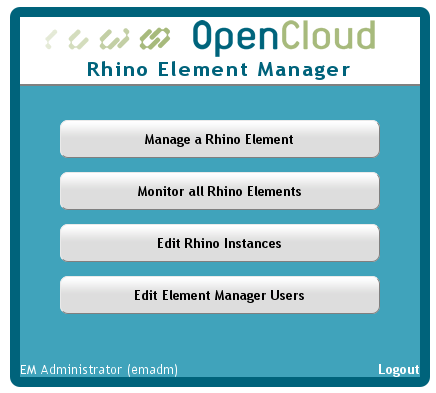
Enter your username and password, and click Login. The REM menu displays.
The default administrator login (which you’ll want to change) is username emadm and password password.
|
||
2 |
If this is the first time REM has been used you will probably need to either:
|
Running REM as a production service
rem.sh is usually used when testing or configuring a new rem instance. When deploying REM in a production environment it is usually desirable to run it as a daemon. Two scripts are provided for this purpose, an init script and a simple daemon script. For information on these see Appendix F. Running REM as a daemon
REM Functional Areas
The Rhino Element Manager has the following main functional areas:
| |
More detailed instructions for each area can be found in the built-in help in REM. |
REM Management
Rhino instances
REM can monitor and manage multiple Rhino instances at once.
The instances can be:
-
RhinoSDKs
-
Production Rhino clusters
-
different versions (as long as listed as a supported version in the REM documentation)
-
local or remote (as long as they are accessible by the REM server)
To manage Rhino instances in REM, select Edit Rhino Instances from the home page.
| |
You must be logged in as a REM user that is assigned a role with the REM Feature: Edit Rhino Instances permission. |
REM users and roles
REM has its own users and roles separate from those in Rhino.
REM users can be assigned one or more roles. Roles can be assigned permissions for various high-level REM features and given access to specific Rhino instances.
To manage REM users and roles, select Edit Element Manager Users and Roles from the home page.
| |
You must be logged in as a REM user that is assigned a role with the REM Feature: Edit Users and Roles permission. |
Rhino Management
To manage aspects of a specific Rhino instance:
1 |
Select Manage a Rhino Element from the home page. |
2 |
Connect to a configured Rhino instance using the Connect to … dropdown in the main area or by clicking the New Connection link in the upper right. |
| |
You must be logged in as a REM user that is assigned a role with the REM Feature: Manage Element permission. |
SLEE Management
REM allows one to view and modify a Rhino instance’s SLEE management state.
To view or modify SLEE management state:
1 |
Ensure you are in the Rhino Management area and connected to a Rhino instance. |
2 |
Select an item from the Management menu. |
This includes:
| Item | To |
|---|---|
SLEE State |
View current SLEE state; start/stop SLEE, services, and RA entities. |
Alarms |
View current alarms; clear alarms; log all alarms; rebroadcast all alarms. |
Deployment |
View deployed components; install new DUs; uninstall DUs; change component install levels. |
Profiles |
View profile tables, profiles, and profile data; create/delete profile tables; create/edit/delete profiles. |
Resources |
View resource adaptors and RA entities; create/edit/delete RA entities. |
Services |
View/start/stop services. |
Usage |
View/create usage parameter sets; view/enable/disable usage notifications. |
Bindings |
View/add/remove service bindings. |
Component Priorities |
View/edit component start/stop priorities. |
Rhino Configuration
REM allows one to view and modify a Rhino instance’s runtime configuration.
To view or modify Rhino configuration:
1 |
Ensure you are in the Rhino Management area and connected to a Rhino instance. |
2 |
Select an item from the Configuration menu. |
This includes:
| Item | To |
|---|---|
Threshold Rules |
View/edit/create/delete/enable/disable threshold rules. |
Rate Limiters |
View/edit/delete rate limiters. |
Licenses |
View/install/remove licenses. |
Logging |
View/edit log levels; view/edit/create/remove appenders. |
Pools |
View/edit object pools. |
Staging Queue |
View/edit staging queue settings. |
SNMP |
View/edit SNMP configuration; enable/disable SNMP agent; view/edit OID and counter mappings. |
Auditing |
View/edit auditing level; view opcodes. |
Domains |
View replication domains. |
Security Policy |
View Rhino security policy. |
Alarm Catalog |
View information on alarms that could be raised. |
Access Control |
Manage Rhino roles and permissions; enable/disable permission logging. |
Persistence |
View/edit/delete persistence instances, persistence resources, and JDBC resources. |
SAS |
View/edit SAS configuration and resource bundle mappings. |
Inspecting state
REM allows one to inspect the state of a Rhino instance.
To inspect Rhino state:
1 |
Ensure you are in the Rhino Management area and connected to a Rhino instance. |
2 |
Select an item from the Inspections menu. |
This includes:
| Item | To |
|---|---|
Activities |
View and remove activities. |
SBBs |
View and remove SBBs. |
Timers |
View and remove timers. |
Transactions |
View and rollback long-running transactions. |
Threads |
View SLEE event router threads. |
AC Bindings |
View activity context bindings. |
Monitoring
REM allows one to monitor the state of a Rhino instance.
To monitor a Rhino instance:
1 |
Ensure you are in the Rhino Management area and connected to a Rhino instance. |
2 |
Select an item from the Monitoring menu. |
This includes:
| Item | To |
|---|---|
Dashboard |
See a general overview instance state and statistics. |
Tracing |
Configure trace levels and monitor trace messages. |
Statistics |
Subscribe to and monitor statistics. |
Logging |
Monitor log messages. |
Using REM tools
Tools for giving feedback, annotating and displaying the log, and a command line
The Element Manager comes with tools for providing feedback, annotating the REM log, opening a command-line interface, and displaying the audit log.
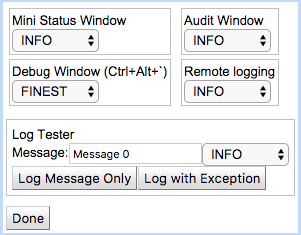
Log Controls
REM sends log messages to four destinations:
To control log levels for the four destinations:
1 |
From the Monitoring Dashboard, select Tools > Log Control. |
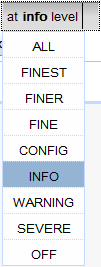
2 |
Click to select a particular handler level.
|
3 |
To see how each of the four handlers treats a log message at a particular level: * Enter it in the Message field, and click Log Message Only or Log with Exception. |
4 |
When you are done controlling logging options, click Done. |
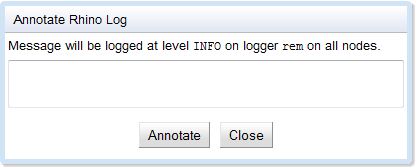
Annotate Rhino Log
To manually add a message to the Rhino log:
1 |
From the Monitoring Dashboard, select Tools > Annotate Rhino Log. |
2 |
Enter your message, and click Annotate. |
Command Line
REM provides a command-line interface, identical to the rhino-console.
To use the REM command-line interface:
1 |
From the Monitoring Dashboard, select Tools > Command Line. |
2 |
Enter Rhino console commands. |
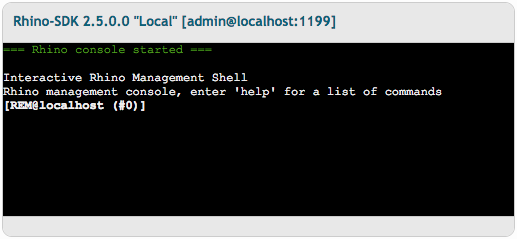
Full help is available online.

REM Plugins and Extensions
The Rhino Element Manager supports plugins and extensions.
These can add server-side functionality such as custom servlets as well as contribute client-side elements to the REM web interface.
The new REM plugin framework has superseded the older extension framework. Development of new extensions is deprecated in favour of plugins, but installing existing REM extensions is still fully supported.
REM plugins and extensions can coexist in a REM installation.
Installing REM Plugins
To install plugins into REM:
1 |
Copy all the plugin jar files that you want to install into the |
|---|---|
2 |
Restart REM or whatever servlet container you are running REM in. Next time you refresh your browser and connect to REM your plugins should be present. |
Installing REM Extensions
To install extensions into REM:
1 |
Open a terminal, and |
|---|---|
2 |
Copy all the extension zip files that you want to include with REM into the For example: cp my-extension.zip admin/extensions/ cp my-other-extension.zip admin/extensions/ |
3 |
Run the The script bundles the extensions in |
4 |
If you are using the default bundled Jetty server, you will need to:
If you are using Tomcat or some other servlet container you will need to:
Next time you refresh your browser and connect to REM your extensions should be present. |
Manually Upgrading REM
Manually upgrading REM to a new version
| |
This manual upgrade process is largely superseded by the partially automated upgrade process, which is now the recommended way to upgrade a Tomcat based REM installation in a production environment. |
The Rhino Element Manager stores some configuration data locally.
This includes:
rem_data |
Derby database storing Rhino instances, saved credentials, users, roles, and permissions |
rhino-ems.ks |
keystore containing trust certificates for Rhino instances |
.encryption.password |
file containing the password used to encrypt and decrypt the Rhino credentials stored in |
You may also have:
-
REM Plugins — installed in the
pluginsdirectory -
REM Extensions — placed in
admin/extensionsand installed using theadmin/install-extensions.shscript
| |
Plugins and extensions may store their own data in REM’s home directory. Refer to the documentation for each plugin and extension you have installed for information on what additional files need to be considered when upgrading. |
The upgrade process differs slightly depending on how you run REM:
Upgrading REM in the standard distribution
To upgrade REM when running it from the standard distribution package (using the embedded Jetty web server):
1 |
Locate the data files mentioned above in your existing REM installation. By default they will all be stored in the root of your existing REM installation ( |
2 |
Copy the files mentioned above into the root of your new REM installation ( cp -R rhino-element-manager-<old_version>/rem_data \
rhino-element-manager-<old_version>/rhino-ems.ks \
rhino-element-manager-<old_version>/.encryption.password \
rhino-element-manager-<new_version>/
Your new REM installation should now contain all the same data as your previous one. |
3 |
Depending on your installation, you may need to: |
Migrating REM Extensions
If you have REM Extensions installed:
1 |
Verify that they are compatible with the new version of REM by referring to the documentation for each extension. |
2 |
Copy them (or newer versions of them) to cp rhino-element-manager-<old_version>/admin/extensions/*.zip \
rhino-element-manager-<new_version>/admin/extensions/
|
3 |
Run the The extensions will be installed into the new version of |
4 |
Following the instructions output by the script, copy |
5 |
If any of the extensions store their own data in REM’s home directory, copy those files to the new REM installation. cp -r rhino-element-manager-<old_version>/<extension_data> \
rhino-element-manager-<new_version>/
|
Migrating REM Plugins
If you have REM Plugins installed:
1 |
Verify that they are compatible with the new version of REM by referring to the documentation for each plugin. |
2 |
Copy them (or newer versions of them) to cp rhino-element-manager-<old_version>/plugins/*.jar \
rhino-element-manager-<new_version>/plugins/
|
3 |
If any of the plugins store their own data in REM’s home directory, copy those files to the new REM installation. cp -r rhino-element-manager-<old_version>/<plugin_data> \
rhino-element-manager-<new_version>/
|
Updating the database schema
The schema for REM’s Derby database (rem_data) may require updates when upgrading between major versions of REM.
REM includes a schema update tool that can apply any required schema updates automatically. All existing data will be maintained, with some data being migrated when necessary.
To enable automatic updating of REM’s database schema:
1 |
Uncomment this line in REM’s startup script: #JVM_ARGS="${JVM_ARGS} -Drem.schema.update.enabled=true"
|
2 |
Start REM (stopping it first if it was already running). Any database schema updates found to be required will be applied. |
| |
Refer to rem.log for messages regarding the update process. |
Upgrading REM in Apache Tomcat
To upgrade REM when running it in Apache Tomcat:
1 |
Locate the data files mentioned above in your If you followed the original instructions for running REM in Apache Tomcat, this will be cd apache-tomcat-<version> |
2 |
Make a backup copy of the entire cp -R rem_home rem_home_OLD |
3 |
Make a backup of your existing cp webapps/rem.war rem.war_OLD |
4 |
Copy the new version of cp /full/path/to/rhino-element-manager-<new_version>/admin/resources/rem.war webapps/rem.war |
4 |
Copy the new version of cp /full/path/to/rhino-element-manager-<new_version>/rem-rmi.jar bin/rem-rmi.jar |
5 |
Review the instructions for running REM on Apache Tomcat to check if there are any additional changes or steps required. |
6 |
Depending on your installation, you may need to: |
Migrating REM Extensions
If you have REM Extensions installed:
1 |
Verify that they are compatible with the new version of REM by referring to the documentation for each extension. |
2 |
Copy them (or newer versions of them) to |
3 |
Run the The extensions will be installed into the new version of |
4 |
Following the instructions output by the script, copy |
Migrating REM Plugins
If you have REM Plugins installed:
1 |
Verify that they are compatible with the new version of REM by referring to the documentation for each plugin. |
2 |
Replace any that require upgrading with newer versions of them (making backups of the old ones if desired). |
Updating the database schema
The schema for REM’s Derby database (rem_data) may require updates when upgrading between major versions of REM.
REM includes a schema update tool that can apply any required schema updates automatically. All existing data will be maintained, with some data being migrated when necessary.
To enable automatic updating of REM’s database schema:
1 |
Add # Enable automatic REM database schema updates CATALINA_OPTS="$CATALINA_OPTS -Drem.schema.update.enabled=true" |
2 |
Start Apache Tomcat (stopping it first if it was already running). Any database schema updates found to be required will be applied. |
| |
Refer to your Tomcat logs for messages regarding the update process. |
Appendix A. Known issues in REM
This page lists several known issues in REM.
Issue: The refresh timer sometimes causes pages to refresh while you’re editing.
Workaround: Disable refresh (through the Refresh menu).
Issue: Serialization errors when shutting down REM.
Explanation: Depending on which screens have been used, some objects stored in the servlet session cannot be persisted to disk when REM shuts down. These sessions will not be restored when REM restarts, but the error is otherwise harmless.
Issue: Inspection filter form values don’t reset when cancel is pressed.
Workaround: Change the filter values back manually, to avoid having them applied next time the list is refreshed.
Issue: Embedded Rhino console fails to load with a JavaScript error terminal.proposeGeometry is not a function.
Explanation: The JavaScript Terminal implementation was upgraded, but your browser may have the old version cached.
Workaround: Clear your browser’s cache and reload the page.
Appendix B. System properties
REM system properties
REM supports the following system properties that affect its runtime behaviour:
| Property | Valid values (default in bold) | Description |
|---|---|---|
|
true, false |
If set to true, disables login from a cookie. Normally authentication tokens in a cookie will be checked when the app is reloaded and can continue to be used. Disabling this feature increases security but forces users to re-login when the app is restarted (with F5 for example.) |
|
true, false |
If set to true, disables the feature that allows the administrator to restart the REM server (if started by |
|
${JETTY_HOME} |
Path to the directory where REM should store its working files (Derby database, keystore, etc.) |
|
${rem.home}/plugins |
Path to the directory where REM should search for plugins. |
|
${rem.plugins.dir} |
Path to the directory where REM should expand plugins to. |
|
true, false |
If set to true, enables automatic database schema updates to |
Appendix C. SSO Authenticator
REM Single Sign-on Authenticator
| |
What is the SSO Authenticator?
Single sign-on (SSO) infrastructure stores a username and password, and uses a simple HTTP request to login. |
REM’s SSO authenticator allows authentication using a simple HTTP POST instead of the login dialog box in the Element Manager user interface.
The REM SSO authenticator uses the following fields:
-
URL — http:// host : port /rem/rem/sso_authenticator
-
Username form field — username
-
Password form field — password
-
Instance ID form field (optional) — instance
Opening the URL in a browser displays a simple form that can be submitted for sign on (though typically the SSO infrastructure takes care of the submission). The authenticator authenticates the submitted username and password against the Element Manager user database. If successful, it returns an HTTP redirect (containing a URL) to the main UI page. A browser can then be launched with that URL. The URL is valid for 60 seconds and can be used only once.
If an instance ID is supplied, the Element Manager automatically connects to the instance, provided:
-
the instance has a stored Rhino username and password
-
the user has
adminrights to that instance.
Appendix D. Running REM over HTTPS
HTTPS for added security
By default REM runs over HTTP in the bundled Jetty web server. If additional security is required, there are a couple ways in which REM can be run over HTTPS.
Changing Jetty to Use HTTPS
An example configuration for HTTPS is provided in recent versions of REM. To enable this, open the start.ini file and uncomment the ssl and https modules:
-# --module=ssl
+--module=ssl-# --module=https
+--module=httpsYou will also need to provide or create a proper web keystore (by default located at etc/keystore inside the main rhino-element-manager directory).
-
For more detailed instructions on creating a keystore and configuring HTTPS in Jetty, see Configuring Security in the Jetty documentation.
Running REM behind Apache
If you have an existing Apache installation that is already configured to use HTTPS, then you may wish to serve REM through that.
The setup can be a bit complicated on the Apache side and a couple different options are available.
-
For detailed instructions see How to use Jetty with Apache, AJP, mod_jk, mod_proxy_balancer
Appendix E. Running REM on Apache Tomcat
REM on Apache Tomcat
By default REM runs on the Jetty web server bundled in the REM distribution package. The REM application is packaged as a standard war though, so running it on a different servlet container, like Apache Tomcat, is quite straightforward.
You will need:
-
the REM distribution package —
rhino-element-manager-<version>.zip; expanded to a location of your choice. -
an Apache Tomcat installation — either downloaded and configured manually, or installed via a package manager; minimum supported version is
7.0.39.
Setting up Tomcat to run REM
1 |
REM requires a few System Properties to be set in order to function properly. In your Apache Tomcat installation, edit (or create) REM_HOME="$CATALINA_BASE/rem_home" CATALINA_OPTS="-Drem.home=$REM_HOME -Dderby.stream.error.file=$REM_HOME/derby.log -Drem.norestart=true" CLASSPATH="$CATALINA_BASE/bin/rem-rmi.jar" If you wish to have REM store its working files in a different location, you can change the |
2 |
The |
3 |
Copy You should now be able to start Apache Tomcat and access REM at |
Customize REM logging
1 |
Unzip cd apache-tomcat-<version> mkdir rem-tmp cd rem-tmp unzip ../webapps/rem.war WEB-INF/classes/log4j2.properties |
|---|---|
2 |
Edit The default logging configuration is: # log4j 2 configuration
status=error
name=PropertiesConfig
appender.rolling.type=RollingFile
appender.rolling.name=FILE
appender.rolling.fileName=${sys:catalina.base}/logs/rem.log
appender.rolling.filePattern = ${sys:catalina.base}/logs/rem.log.%i
appender.rolling.policies.type = Policies
appender.rolling.policies.size.type = SizeBasedTriggeringPolicy
appender.rolling.policies.size.size=10MB
appender.rolling.strategy.type = DefaultRolloverStrategy
appender.rolling.strategy.max = 10
appender.rolling.layout.type=PatternLayout
appender.rolling.layout.pattern=%d{yyyy-MM-dd HH:mm:ss,SSS} %-5p <%t> [%c] %m{nolookups}%n
logger.rolling.name=rem
logger.rolling.level=INFO
rootLogger.level=INFO
rootLogger.appenderRef.file.ref=FILE
|
3 |
Replace zip ../webapps/rem.war WEB-INF/classes/log4j2.properties |
4 |
Remove temporary files: cd .. rm -rf rem-tmp |
| |
See the Log4j 2 documentation for more information on logging configuration. |
Appendix F. Running REM as a daemon
In most production deployments it is desirable to run REM as a daemon.
Remd
The remd.sh script starts the Rhino Element Manager as a background service and provides basic control actions. This script does not provide control of REM instances started with the rem.sh script, even if they share the same $REM_HOME.
Usage: ./remd.sh {start|stop|restart|check}| Command | Action |
|---|---|
start |
Start REM as the |
stop |
Stop the REM server process |
restart |
Restart the REM server |
check |
Check the REM process is running |
Init script
A sample init script is provided in init.d/rhino-element-manager, offering similar functionality to remd.sh for operating systems using a SystemV type init system. This script is written for LSB compliant Linux systems and must be modified for other systems.
| Command | Action |
|---|---|
start |
Start REM as the |
stop |
Stop the REM server process |
restart |
Restart the REM server |
status |
Check the REM process is running |
Configuration of the init script may be provided in the system environment or by editing the values at the top of the file.
Variable |
Value |
REM_USER |
Username of the user to run the REM server as. |
REM_HOME |
Path to the |
JAVA_HOME |
Path to the base directory of the JRE used to run REM. Typically this will be a path like |