The REM Plugin SDK is a framework for developing custom plugins for REM. It provides a template for creating new plugins, templates for generating new management panels and monitoring extensions, and also some documented examples with provided code.
| |
Developing REM plugins requires a working knowledge of Google Web Toolkit (GWT). |
The REM Plugin SDK does not include the GWT SDK. You must download GWT 2.7.0 (direct link), extract it, then run script copy-gwt-libraries.sh from the REM Plugin SDK package.
Topics
create new REM plugins from the provided prototype |
|
generate management panels for a REM plugin from provided templates |
|
generate monitoring extensions for a REM plugin from provided templates |
|
run your plugin in GWT developer mode |
|
build and package your REM plugin for distribution |
|
install your plugin into REM |
|
advanced development topics for REM SDK |
Other documentation for the Rhino Element Manager, including the changelog, links to downloads, and the API documentation can be found on the REM product page.
| |
The REM Plugin SDK is distributed as a separate package:rhino-element-manager-sdk-<version>.zip |
= Creating a New REM Plugin :sortorder: 2
To create a new REM plugin:
1 |
Open a terminal, and |
|---|---|
2 |
Run For example: ./create-plugin.sh -m foo -c Foo The REM Plugin SDK creates a new REM plugin (in the example, |
You can then add management panels and monitoring extensions to your plugin.
= Adding a Management Panel :sortorder: 3
To add a management panel to a REM plugin:
1 |
Open a terminal, and |
|---|---|
2 |
Run For example: ./create-management-panel.sh -f bar -c Bar -p bar The SDK generates a new management panel from the template into your plugin’s |
3 |
Configure Google Guice and Gin bindings:
|
4 |
Hook up your panel to the menus and deck:
|
5 |
You can repeat this process using different values to create several management panels within your plugin. |
You can then run your plugin to see what it looks like.
-
Google Guice is a dependency injection framework.
-
Google Gin is a layer on top of Guice that provides Guice binding and injection to client-side GWT code.
For details, please see the Google Guice Project.
= Adding a Monitoring Extension :sortorder: 4
To add a monitoring extension to a REM plugin:
1 |
Open a terminal, and |
|---|---|
2 |
Run For example: ./create-monitoring-extension.sh -f bar -c Bar The SDK generates a new monitoring extension from the template into your plugin’s |
3 |
Fill in the monitoring request handler implementation:
|
4 |
You can repeat this process using different values to create several monitoring extensions within your plugin. |
You can then run your plugin to see what it looks like.
= Running your plugin :indexpage: :sortorder: 5
To run your plugin (in dev-mode):
1 |
Open a terminal, and |
||||
|---|---|---|---|---|---|
2 |
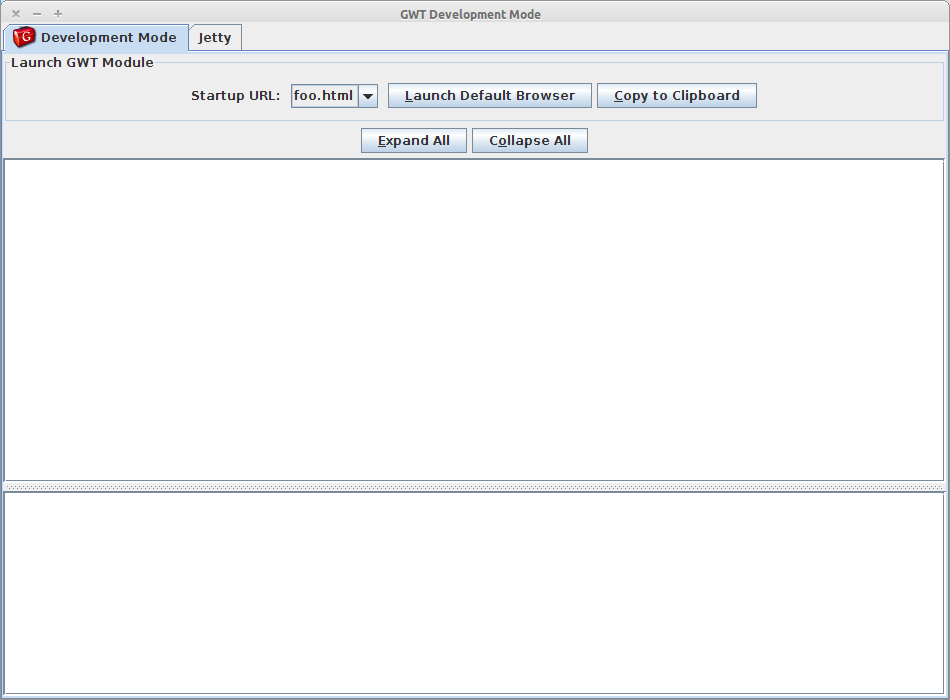
Run The SDK compiles your code, and starts GWT Dev Mode. 
|
||||
3 |
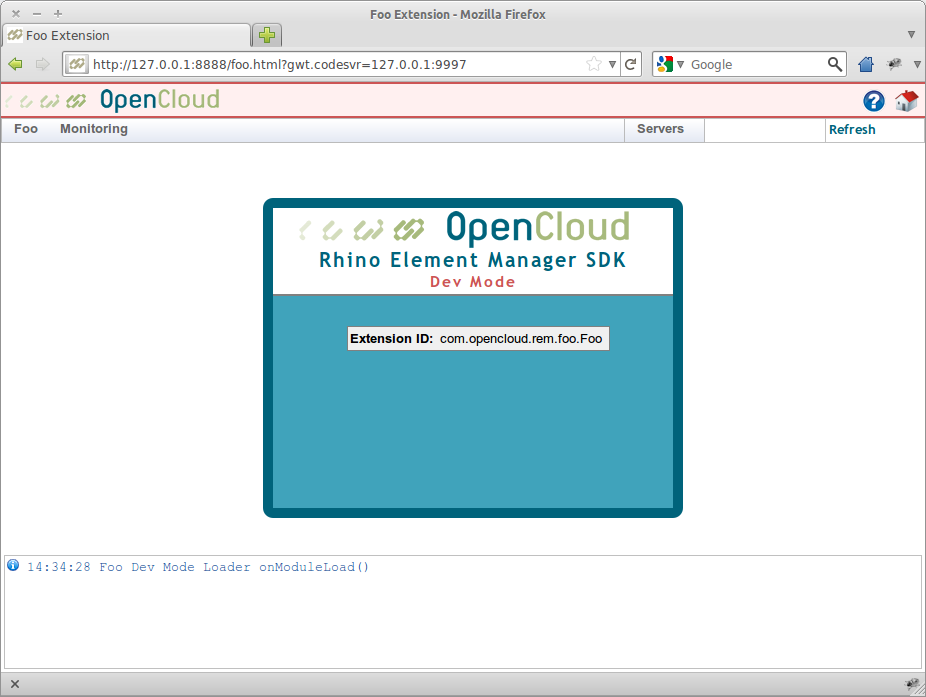
Click the Launch Default Browser button to load the REM plugin into your default browser + (or click the Copy To Clipboard button, and paste the link into any browser). 
|
||||
4 |
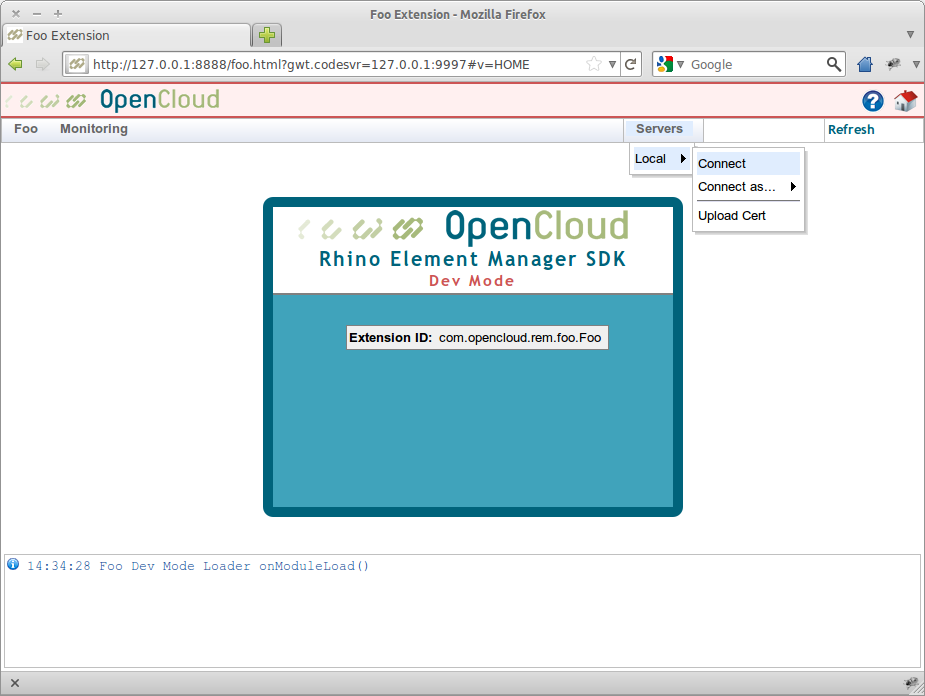
Connect to a Rhino instance using the Servers menu. 
|
The main instance manager in REM is not available for plugins in dev-mode.
Instead, there is a csv file (servers.csv) that contains all the Rhino server configurations. The first time you run dev-mode, REM creates servers.csv in your module directory, pre-populated with the default local Rhino connection. After that, you can edit the servers.csv file by hand to add Rhino instances. REM will pick up the changes the next time you refresh your browser (without having to restart dev-mode).
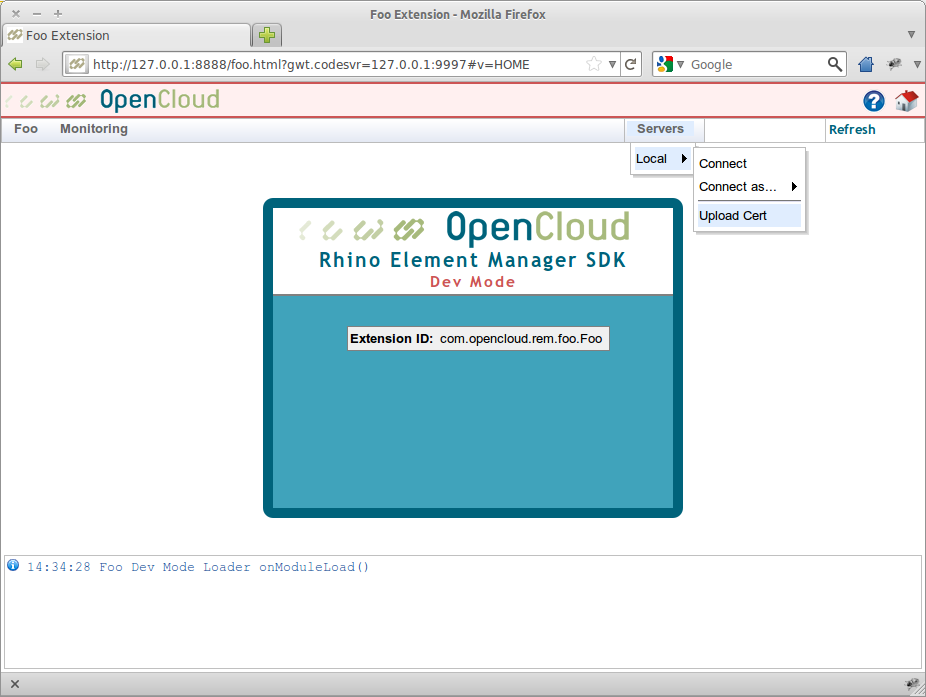
The SDK also supports uploading Rhino trust certificates, under each entry in the Servers menu.
If it all looks good, next you can build and package your plugin for installation into REM.
= Uploading a trust certificate
To upload a trust certificate for a Rhino instance in plugin dev-mode:
1 |
Find the Rhino instance in the Servers menu, and select the Upload Cert option. 
A dialog box displays for uploading the certificate file. |
|---|---|
2 |
Click the Browse button; then find and select the 
The SDK uploads the certificate file, and adds it to the |
= Building your Plugin :sortorder: 6
To build and package your plugin:
1 |
Open a terminal, and |
|---|---|
2 |
Run The SDK compiles your plugin, and bundles it in a jar under |
You can now install your plugin into REM.
= Installing Plugins :sortorder: 7
See Installing REM Plugins in the REM Guide.
= Advanced Topics :indexpage: :sortorder: 8
Here are some advanced development topics for the REM SDK.
link to REM screens from within your plugin |
|
include third-party libraries with your plugin |
|
use the plugin-first class loader to override third-party libraries |
|
convert an existing REM extension into a REM plugin |
= Linking to REM :sortorder: 1
To create a link to a page in REM from within your plugin:
1 |
Add a For example: |
|---|---|
2 |
Add a For example: |
3 |
Add an import for |
4 |
Add an import for |
5 |
Add code to your presenter implementation when For example: |
6 |
Add code to your panel implementation to update the link. For example: |
When running your plugin in dev-mode, the link will show as a title tooltip; and clicking will display an error popup. When deployed in REM, it will target the link to REM itself.
= Including Third-party Libraries :sortorder: 2
To include third-party libraries with your plugin:
1 |
Copy your additional third-party libraries into the |
|---|---|
2 |
Edit For example: |
If your plugin needs a different version of a library already provided by REM, you will need to use the plugin-first class loader in addition to the above.
= Using the Plugin-First ClassLoader :sortorder: 3
Each REM plugin has its server-side classes loaded in a child ClassLoader with REM’s main ClassLoader as its parent. By default, this is a simple URLClassLoader which delegates to REM’s class loader first before attempting to load a class from the plugin itself.
If your plugin needs to use a different version of a third-party library that is bundled with REM, it must specify that it requires the plugin-first class loader. This reverses the delegation order so that your plugin’s class loader will be checked first before delegating to REM’s class loader.
1 |
Open your plugin’s For example: |
|---|---|
2 |
Rebuild your plugin and install it into REM. Your plugin’s classes will now take precedence over those bundled with REM. |
= Converting a REM Extension into a Plugin :sortorder: 4
Previous versions of REM supported extensions by generating *-em.war extension archives and installing them directly into the main rem.war file. If you have developed one of these types of extensions, it is still supported, but it is also quite straight forward to convert it into a plugin.
To convert your extension into a plugin:
1 |
Open your extension’s plugin.version=<Version of your plugin> plugin.description=<Short description of your plugin> For example: plugin.version=1.0 plugin.description=Example Element Manager Plugin |
|---|---|
2 |
Open your extension’s The |
3 |
Open your extension’s main |
4 |
Open your extension’s Your extension is now a REM Plugin. |
5 |
(Optional) If your main
For example: |